Guide
How to use Picsta Uploader
Picsta Uploader is the free Mac app for uploading whole weddings. Here is everything, one step at a time. In the app, Help (top right) has the short version, and a link back here.
Before you start
- A Mac with macOS 10.15 or later (Apple Silicon or Intel).
- A Picsta account with a verified email, and the event already made on picsta.app.
- Your photos as JPEG or PNG files in a folder (a Lightroom export, for example).
1. Install the app
- Go to picsta.app/uploader and click Download for Mac.
- Open the downloaded file and drag Picsta Uploader into Applications.
- Open Picsta Uploader from Applications.
2. Connect it to your account
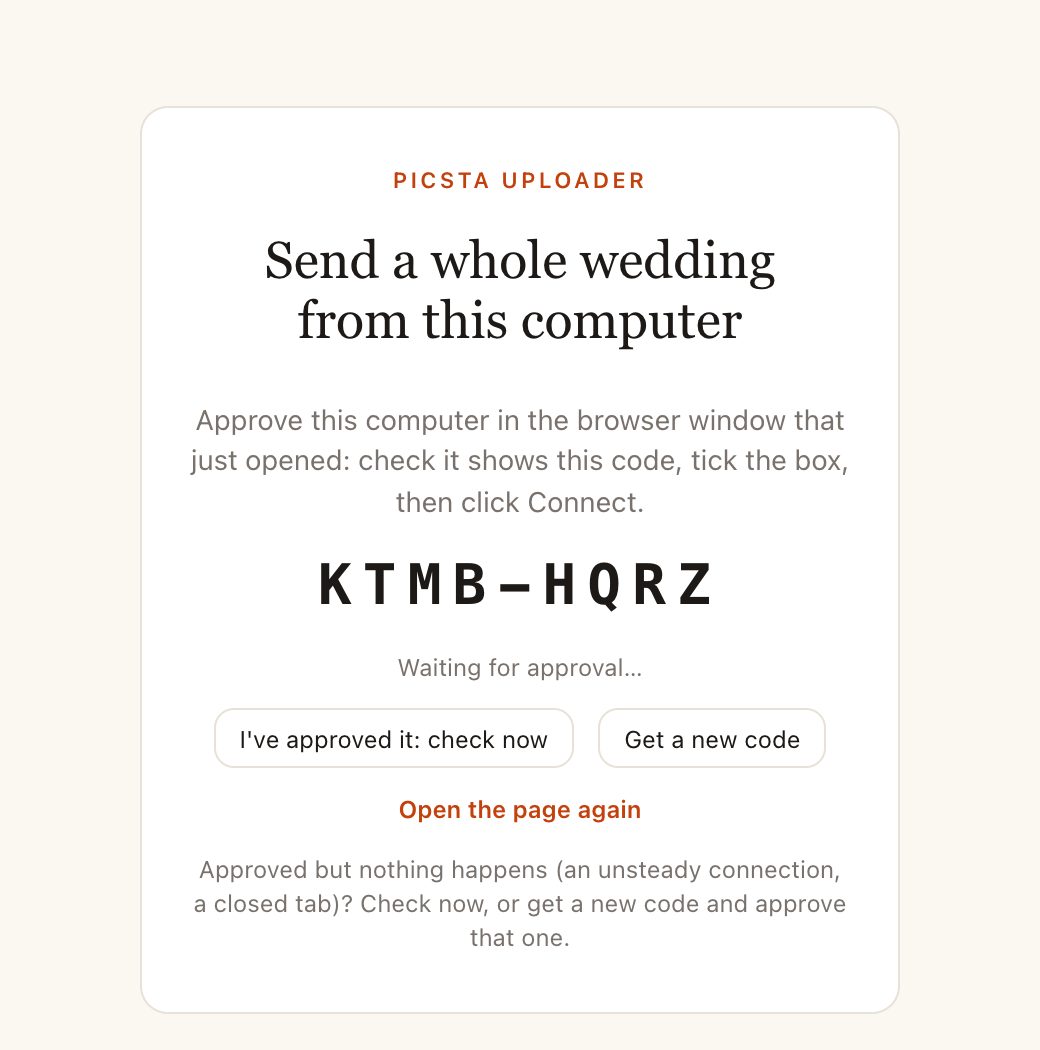
- Click Connect to Picsta. Your browser opens picsta.app with a short code.
- Check the code in the browser is the same as in the app, tick the box and click Connect. Sign in first if asked.
- The app moves on by itself and shows Signed in as your name at the top.
3. Choose where the photos go
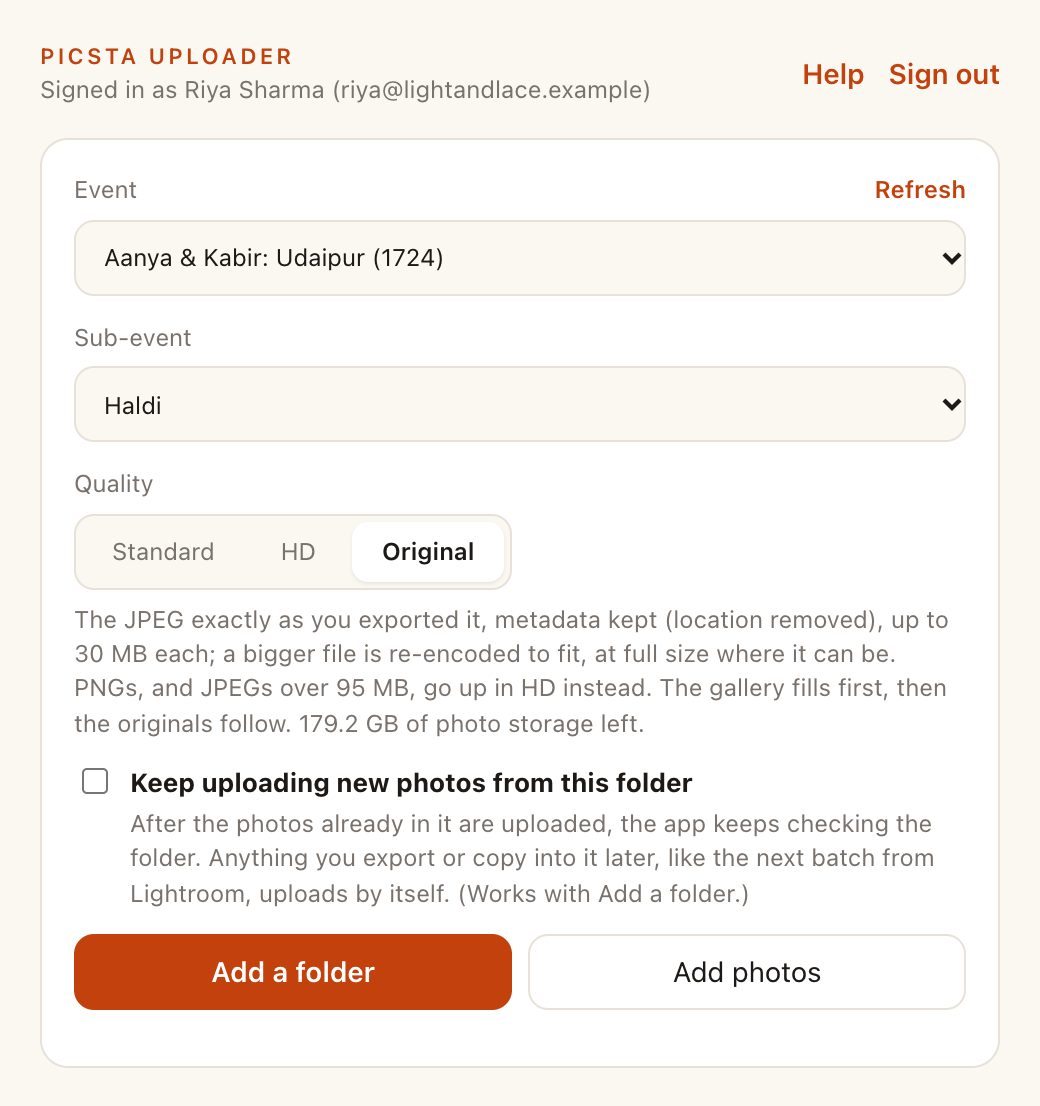
- Event: the wedding or event. Made it just now on picsta.app? Click Refresh.
- Sub-event: Haldi, Sangeet, Day 2 and so on, or Not sure. New sub-event… adds one. (Advanced plan and up.)
- Who can see (group events only): everyone in the group, only people in the photos, or people you choose.
- Quality: Standard, HD, or Original (professional accounts with photo storage) for the exact files.
4. Add a folder and confirm
- Click Add a folder (everything in it, subfolders too) or Add photos (pick files).
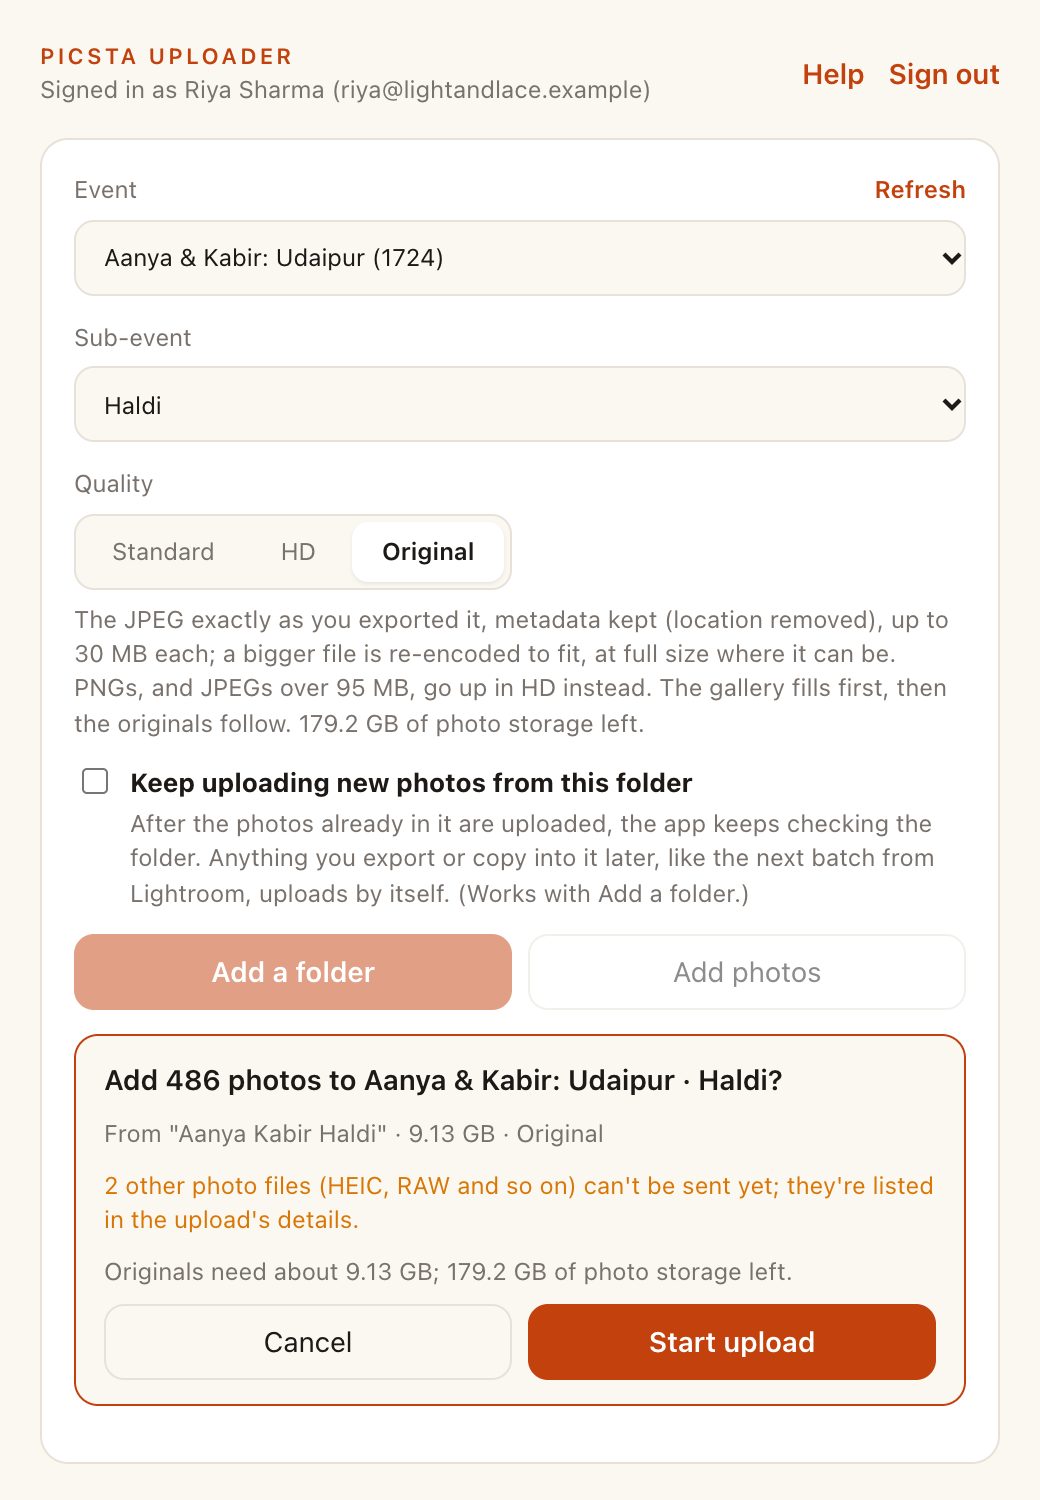
- Read the summary: how many photos, to which event, at what quality, and anything that can't be sent.
- Click Start upload. Nothing is sent before that; Cancel drops it.
5. Let it run
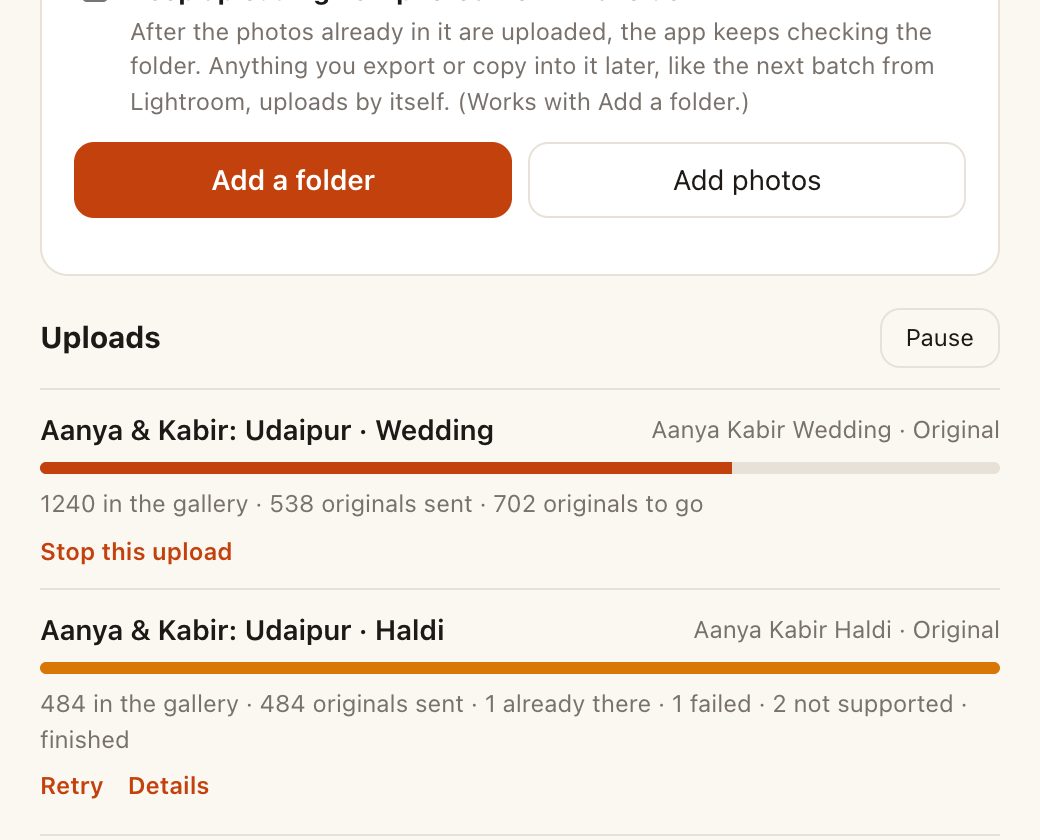
The gallery copies go first, so the gallery can be shared within minutes; with Original, the exact files follow. You can add more folders: they line up behind each other.
- Close the window if you like: the uploads carry on from the menu bar icon (top right of the screen).
- Keep the Mac's lid open. The app stops the Mac sleeping on its own while it works, but closing the lid pauses it.
- Picsta sends one notification when everything is in, not one per folder.
- For Find Me and people, click Process photos on the event, as usual. (Uploads set to Only people in the photos are processed by themselves.)
6. Check what didn't upload
An upload with anything to report has Details: every photo that wasn't simply added, grouped by why, with the file names. Copy list copies them; Retry tries the failed ones again.
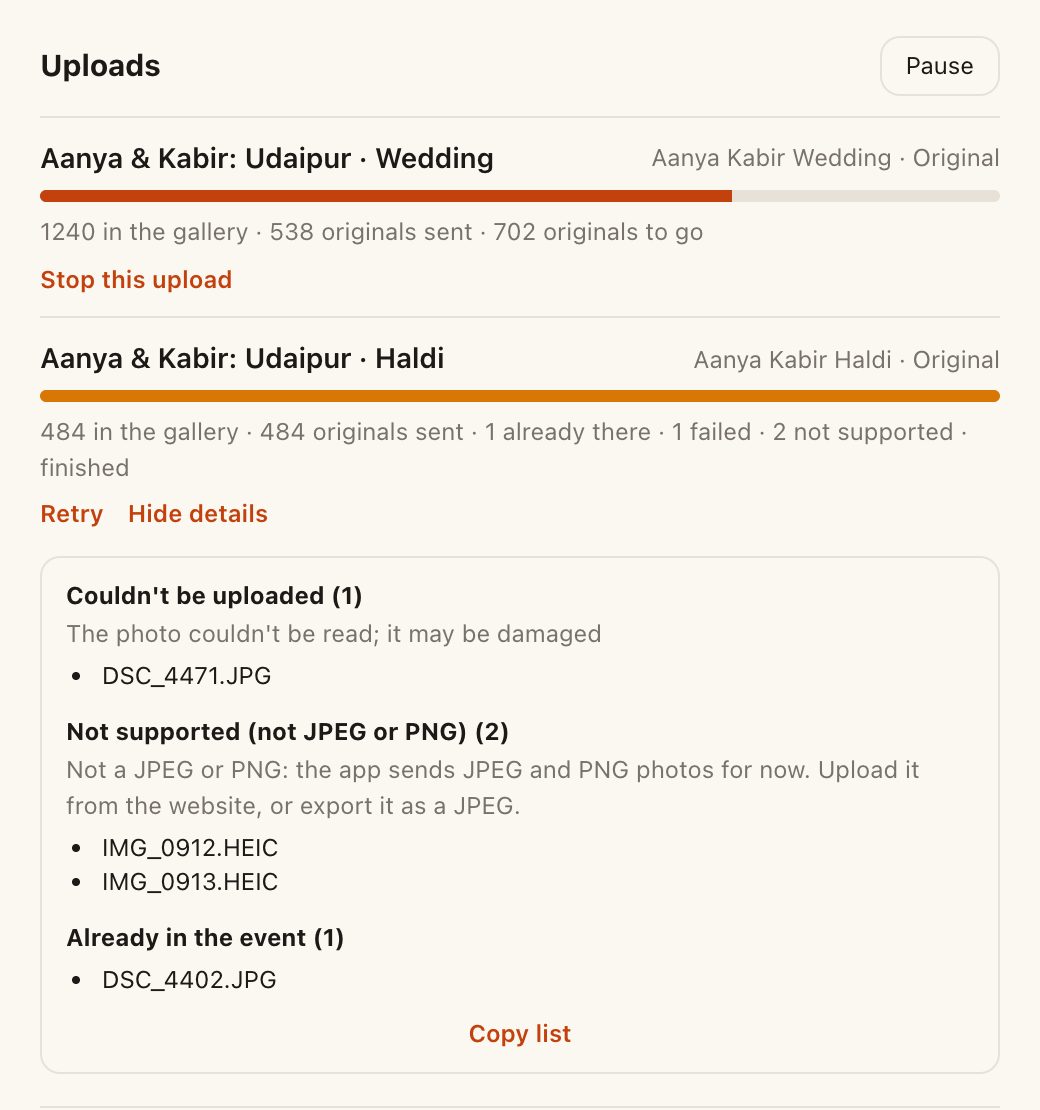
Something else not right? The questions below cover the common cases, and the chat on picsta.app knows the app too.
Step by step
- 1
Install the app
Download Picsta Uploader for Mac from picsta.app/uploader, open the file and drag the app into Applications.
- 2
Connect it
Open the app, click Connect to Picsta, check the code in the browser matches, tick the box and click Connect.
- 3
Choose where the photos go
Pick the event, the sub-event and the quality (and, for a group event, who can see).
- 4
Add a folder and confirm
Click Add a folder, check the summary and click Start upload.
- 5
Let it run
Close the window if you like: it carries on from the menu bar. Keep the Mac's lid open.
- 6
Check what didn't upload
Click Details on an upload to see any photo that wasn't added and why; Retry tries again.
Frequently asked questions
I approved the code but the app is still waiting.
Click I've approved it: check now. If it still waits (an unsteady connection, a closed tab), click Get a new code and approve the new one. A code lasts 10 minutes.
Some photos say Not supported.
The app sends JPEG and PNG photos. HEIC (iPhone), camera RAW and similar files are listed under Details. Export them as JPEGs, or upload them from the website, which accepts HEIC and RAW.
It says photo storage is full.
The photos that don't fit wait, with their originals, so nothing goes up without its original. Free up space on picsta.app (delete an older event you no longer need) or upgrade your plan, then click Resume on that upload.
An upload stopped with a message.
The event was deleted, your plan won't take more photos, or someone you chose in Who can see left the group. Fix that, then add the photos again (or click Retry).
I unplugged the card or drive.
Those photos wait for it. After about ten minutes they show as drive not connected under Details; plug it back in and click Retry.
My Mac restarted overnight.
Open the app again and it carries on where it stopped, without sending anything twice. Tick Open Picsta Uploader when this Mac starts (under Settings, at the bottom of the window) to have it reopen by itself.
How do I disconnect the app?
Click Sign out in the app, or in Picsta go to Settings, Privacy & Security, Your devices and sign out Picsta Uploader. The app can only upload: it can't delete, share or download anything.
Related guides
Start your gallery in minutes
Create a private event gallery, share it with a link, and let everyone find their own photos with a selfie. Free to start.